
The first time I tried making a dessert at a campsite, I was skeptical. No oven, no stove, and a cooler that barely held ice. But a healthy berry tart? It turned out to be one of the easiest, most satisfying things I’ve ever assembled under a tarp. The trick is knowing how to work with what you have—and keeping things cold.

Why This Tart Works for Camping
This tart is no-bake, which means you don’t need a camp stove or a fire. You mix the crust by hand, press it into a pan, and let the cooler do the rest. The filling is a simple yogurt-based cream that sets up firm enough to slice but stays creamy. Fresh berries provide natural sweetness and a pop of color. It’s a dessert that feels special but requires zero heat—perfect for warm afternoons when you don’t want to fire up a stove.
The Crust: Simple and Sturdy
Graham cracker crumbs are my go-to for camp desserts. They’re lightweight, don’t spoil, and pack flat. You can crush them at home or at the campsite using a zip-top bag and a rock. For the fat, melted coconut oil works better than butter in warm weather—it sets up firmer and won’t soften as quickly if the tart sits out for a few minutes. Mix in a little maple syrup or honey for sweetness. Press the mixture into your pan firmly. Use the bottom of a cup to really compact it. A loose crust will crumble when you slice.
Common Mistake: Not Chilling the Crust Long Enough
I’ve made this mistake more than once. If you don’t let the crust set in the cooler for at least 15 minutes, it will fall apart when you add the filling. Give it time. While it chills, you can mix the yogurt layer.
The Filling: Creamy Without Dairy Worries
Full-fat Greek yogurt is the star here. It’s thick, tangy, and holds up better than regular yogurt. Mix it with a little powdered sugar (it dissolves instantly) and vanilla. If you don’t have powdered sugar, use maple syrup—just add a tablespoon at a time until it tastes right. The mixture should be smooth and spoonable but not runny. Spread it evenly over the chilled crust. Don’t skimp—a thin layer won’t hold the berries.
Berries: Fresh Is Best, But Frozen Works
Fresh berries are ideal because they look beautiful and hold their shape. If you’re using frozen, thaw them completely in a bowl and drain the liquid. Otherwise, the extra moisture will soak into the crust. Arrange the berries in a single layer on top of the yogurt. Overlapping is fine, but don’t pile them—it makes slicing messy. For a glossy finish, warm a spoonful of fruit jam with a splash of water and brush it over the berries. This step is optional but adds a professional touch.
Keeping It Cold: Cooler Strategy
This tart needs to stay cold. If you’re camping in hot weather, place the tart pan directly on a block of ice or a frozen water bottle in the cooler. Serve slices straight from the cooler. If the tart sits out for more than 30 minutes, the yogurt layer will soften. For a firmer texture, freeze the tart overnight at home, then transport it in the cooler. It will thaw gradually and be ready to eat by the second day.
Gear You’ll Need
A tart pan is nice but not required. A disposable aluminum pie pan works perfectly. You’ll also need a mixing bowl, a spoon, and a cup for pressing the crust. That’s it. No stove, no oven, no electricity. Just a cooler and a little patience.
Safety Note: Food Storage
Keep all dairy and berries in a sealed cooler with plenty of ice. At night, store the cooler inside your tent or in a bear-proof container if you’re in bear country. Never leave food out on the table overnight—it attracts wildlife. Wash your hands before assembling the tart, especially if you’re handling berries straight from the bush.
Takeaway
A healthy berry tart is one of those camping desserts that looks impressive but requires almost no effort. The no-bake method means you can make it anywhere, even on a rainy afternoon. Focus on a firm crust, a well-chilled filling, and fresh berries. Your campsite companions will think you smuggled in a bakery. Just don’t tell them how easy it was.
Frequently Asked Questions
Can I use frozen berries for this healthy berry tart?
Yes, but thaw them fully and drain off excess liquid before arranging on the filling. Excess liquid can make the crust soggy. For best results, use fresh berries when possible, especially in warm weather.
How do I keep the tart from melting in hot weather?
Keep the tart in a cooler until serving. If it’s very hot (above 80°F), serve individual slices directly from the cooler. You can also freeze the tart overnight and let it thaw for 15 minutes before eating—it will stay firm longer.
What can I use instead of a tart pan at a campsite?
A disposable aluminum pie pan works perfectly. You can also use a shallow, wide-mouth container like a plastic storage tub. Just press the crust into the bottom and build the tart inside. No special gear needed.
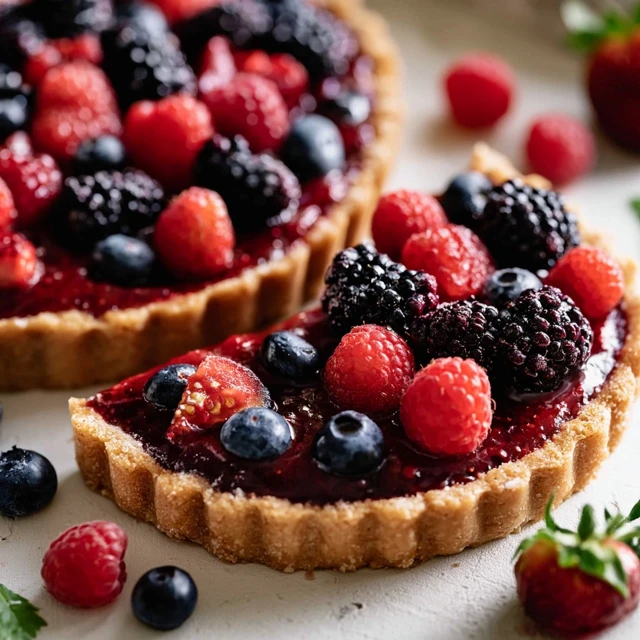
No-Bake Healthy Berry Tart for Camping
Ingredients
Method
- 1. If assembling at the campsite: In a bowl, combine graham cracker crumbs, melted coconut oil, and maple syrup. Stir until the crumbs are evenly moistened and hold together when pressed.
- 2. Press the crumb mixture firmly into the bottom and slightly up the sides of an 8- or 9-inch tart pan (or disposable pie pan). Use the bottom of a cup to press it flat and even. Place in the cooler for 15 minutes to set.
- 3. In a separate bowl, mix the Greek yogurt, powdered sugar, and vanilla until smooth. Taste and adjust sweetness if needed. Spread this filling evenly over the chilled crust.
- 4. Arrange the fresh berries on top of the yogurt layer in a single layer, pressing them in slightly. For a shiny finish, warm the fruit jam with a teaspoon of water and brush it over the berries.
- 5. Refrigerate the tart in the cooler for at least 1 hour before serving (2 hours is better). Slice and enjoy immediately. Store leftovers in the cooler for up to 2 days.