
There’s something about the smell of blackberries cooking over a camp stove that makes the whole trip feel right. Maybe it’s the deep purple bubbling against the side of a cast iron skillet, or the way the sweetness cuts through the pine-scented air. Blackberries don’t need much help to shine, and when you’re camping, that’s exactly what you want: recipes that come together with just five ingredients, no complicated steps, and no extra gear.

Here are three 5-ingredient blackberry recipes that work in a tent camping kitchen. Each one uses simple tools you likely already pack, and each one can be adapted for a camp stove, a campfire, or even no cooking at all.
Camp Stove Blackberry Cobbler
This cobbler is the kind of thing that makes people gather around the stove. The batter puffs up soft and tender, while the berries break down into a thick, jammy layer underneath. It’s not fancy, but it’s satisfying in a way that feels like real camping comfort.
The trick: Use a 10-inch cast iron skillet with a tight-fitting lid or a piece of heavy-duty foil. A lid traps steam and helps the top cook evenly without burning the bottom. If you’re cooking over a campfire, set the skillet on a grate a few inches above the coals, not directly in the flames. Rotate the skillet a quarter turn every five minutes to avoid hot spots.
Common mistake: Stirring the batter too much. Mix just until the flour is wet. Overmixing makes the cobbler tough, and you want it light and fluffy.
Weather adaptation: On a windy day, set up a windbreak around your stove with a cooler or a backpack. Wind can make a camp stove flame uneven, which leads to scorching.
No-Cook Blackberry Whip
When it’s hot and you don’t want to fire up the stove, this is the answer. It’s a creamy, tangy dessert that comes together in a bowl with a whisk. No heat, no cleanup beyond one dish.
The trick: Use a chilled can of coconut cream or heavy cream. If you’re using canned coconut cream, chill it overnight in the cooler. Scoop out the solid white part, leaving the liquid behind. Whip it with a fork or whisk until soft peaks form, then fold in mashed blackberries and a tablespoon of sugar. The key is to mash the berries first with a fork so they release their juice evenly.
Common mistake: Using cream that’s too warm. Warm cream won’t whip properly. Keep everything as cold as possible, even if that means whisking in the shade.
Safety note: If you’re using dairy cream, don’t leave the finished whip out in warm weather for more than an hour. Store leftovers in the cooler.
Blackberry Camp Sauce (for pancakes, oatmeal, or yogurt)
This sauce is more of a method than a recipe, and that’s what makes it useful. You can make it in a small pot or a saucepan, and it works for breakfast or dessert.
The trick: Start with a dry pan over medium heat. Add the blackberries and let them sizzle for a minute before adding any liquid. This caramelizes the natural sugars and deepens the flavor. Then add a splash of water and a tablespoon of sugar, and stir until the berries break down. If you want it thicker, mash a few berries with the back of a spoon. If you want it thinner, add another splash of water.
Common mistake: Adding too much sugar. Blackberries are naturally tart, but the sauce should still taste like fruit, not syrup. Start with one tablespoon and taste before adding more.
Adaptation for kids: Let younger campers help by mashing the berries with a fork. It’s a simple task that makes them feel involved, and it’s hard to mess up.
Gear and Setup Notes
For all of these recipes, a 10-inch cast iron skillet is the most versatile tool. It holds heat evenly and works on a camp stove or over coals. A small saucepan is fine for the sauce. For the no-cook whip, a medium bowl and a whisk are all you need.
Storing leftovers: Blackberry dishes don’t keep well overnight in warm conditions. If you have leftovers, eat them for breakfast or pack them out. Never leave food in your tent—even sweet fruit sauce can attract animals.
Cleaning up: Cast iron needs a gentle touch. Wipe it out with a paper towel while it’s still warm. If bits are stuck, add a splash of water and scrape with a wooden spatula, then dry it over low heat.
Takeaway
Blackberries are forgiving. They don’t demand precision or fancy equipment. With just five ingredients and a little heat, you can turn a handful of berries into something that tastes like the best part of the trip. Next time you’re packing for a tent camping weekend, toss a carton of blackberries in the cooler. You’ll be glad you did.
Frequently Asked Questions
How do I keep blackberries fresh while camping?
Store blackberries in a hard-sided container with a paper towel layer to absorb moisture. Keep them in a cooler in the shade, and use them within the first two days of your trip.
Can I use frozen blackberries for these recipes?
Yes, frozen blackberries work well. Thaw them slightly in the cooler before cooking to avoid extra water in the pan. You may need to cook a minute or two longer.
What if I don’t have a camp stove or fire?
You can make the no-cook blackberry whip with just a bowl and a whisk. For the skillet recipes, a portable propane stove is ideal, but you can also use a campfire with a grate.
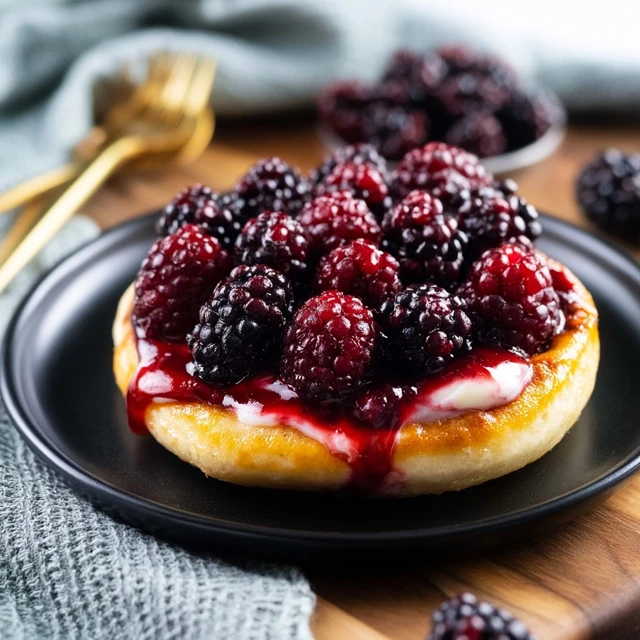
5-Ingredient Blackberry Recipes for Camp Cooking
Ingredients
Method
- Prepare the campfire or camp stove for medium heat. Grease a 10-inch cast iron skillet or a camp-safe baking dish.
- In a bowl, mix flour, 1/2 cup sugar, and baking powder. Stir in milk until just combined. The batter will be thick.
- Spread the blackberries evenly in the skillet. Drop spoonfuls of batter over the berries, leaving some gaps for steam.
- Sprinkle remaining 2 tablespoons of sugar over the top. Cover the skillet with foil or a lid.
- Cook over medium heat for 15-20 minutes, rotating the skillet every 5 minutes for even heat. The cobbler is done when the top is golden and the berries bubble. Let cool for 5 minutes before serving.