
The first time I tried baking a cake on a camp stove, the bottom came out charcoal-black and the center was still soup. I learned a few things since then. This weeknight blackberry cake is the result—a dessert that bakes evenly, tastes like summer, and doesn’t demand a Dutch oven or a fire pit. Just a skillet, a camp stove, and a simple trick with foil.

Why This Cake Works on a Camp Stove
Camp stoves put out concentrated heat from a small burner. That direct flame will burn the bottom of any cake before the middle has a chance to set. The fix is a heat diffuser. A crumpled sheet of heavy-duty foil placed under the skillet spreads the heat out. It mimics the gentle, even heat of an oven. Without it, you are fighting the stove. With it, you are working with it.
Another reason this recipe succeeds: it uses a simple batter that doesn’t need precise temperature control. No creaming butter, no folding egg whites. Just mix, pour, and bake. The berries sink slightly and create pockets of jammy sweetness. The cake stays tender even if the heat wavers a little.
Gear You Need
A 10-inch cast iron skillet is ideal because it holds heat well and distributes it evenly. If you don’t have one, any heavy-bottomed skillet with a tight-fitting lid will work. Avoid thin pans—they create hot spots. You also need a camp stove that can maintain a low, steady flame. A single-burner propane stove is fine. A two-burner works too, just use one burner and keep the other off.
Heavy-duty aluminum foil is essential, both for the heat diffuser and for covering the skillet if you lack a lid. Bring a spatula and a small whisk or fork. That is it.
The Heat Diffuser Trick
Fold a 12×12-inch sheet of heavy-duty foil into a square. Crumple it gently—not into a tight ball, but into a loose, textured pad. Place it directly on the stove grate, then set your skillet on top. This layer of air and foil absorbs the direct heat and radiates it back evenly. It is the single most important step for camp stove baking. Without it, you will get a burnt crust and a raw center every time.
Rotate the skillet a quarter turn every 10 minutes. This compensates for the hot spots that all camp stoves have. Even with a diffuser, the side closest to the burner will cook faster.
Baking in Wind or Cool Weather
Wind is the enemy of even camp stove heat. Set up a windscreen—a foldable metal shield or even a ring of rocks—but leave a gap at the bottom for airflow. Never block the stove’s oxygen intake. In cool weather, the cake will take longer to bake. Add 5 to 10 minutes to the cook time and check with a toothpick. Keep the lid on tight to trap steam and heat.
The Common Mistake to Avoid
Do not lift the lid too often. Every time you lift it, heat escapes and the cake takes longer to cook. Resist the urge to peek until at least 25 minutes have passed. If you must check, do it quickly and replace the lid immediately.
Another mistake: using too much batter. This recipe fills a 10-inch skillet about halfway. If you double it, the cake will be too thick to cook through on a camp stove. Stick to the amounts listed.
Adapting for Fresh or Frozen Berries
Fresh blackberries hold their shape better and release less juice. Frozen berries work too, but they will bleed more color into the batter. That is not a problem—it creates a marbled effect. Do not thaw frozen berries first. Add them straight to the skillet. Expect a slightly longer bake time, about 5 to 8 minutes more, because the cold berries lower the batter temperature.
Serving and Storing
Serve the cake warm, straight from the skillet. A spoonful of plain yogurt or a drizzle of honey cuts the sweetness nicely. If you have leftovers, wrap the skillet in foil or transfer the cake to a container. It keeps at room temperature for a day. To reheat, place the skillet over low heat for 5 minutes with the lid on, or warm slices in a foil packet near the campfire.
Safety Note
Never leave a lit camp stove unattended. Keep the area clear of flammable materials—tent fabric, dry leaves, camp chairs. When you are done, turn off the stove fully and let the skillet cool before packing it away. Store any leftover cake in a sealed container inside your food bag, away from your tent, to avoid attracting wildlife.
Takeaway
A weeknight blackberry cake on a camp stove is not a compromise. It is a different method, and once you learn the heat diffuser trick, it becomes second nature. The cake is tender, the berries burst, and you get a warm dessert without building a fire or hauling a Dutch oven. That is a win for any camping trip.
Frequently Asked Questions
Can I use frozen blackberries for this weeknight blackberry cake?
Yes, frozen blackberries work fine. Do not thaw them first—add them frozen to the skillet. They will release a bit more juice, making the cake extra moist. Just expect a slightly longer bake time, about 5 to 8 minutes more.
What if I don’t have a cast iron skillet?
You can use any heavy-bottomed skillet or even a shallow Dutch oven. Avoid thin pans—they create hot spots. If using a non-stick skillet, keep the heat lower to prevent the bottom from burning before the center sets.
How do I know when the cake is done without an oven thermometer?
Insert a thin skewer or a toothpick into the center. If it comes out clean or with just a few moist crumbs, it is done. Also, the edges will pull away slightly from the pan, and the top will spring back when lightly pressed.
Can I make this cake ahead of time and reheat it at the campsite?
Absolutely. Bake the cake at home, let it cool completely, and wrap it tightly in foil. At the campsite, reheat it in a covered skillet over low heat for 10 minutes, or directly in the coals of a campfire for 5 minutes per side. The berries will re-warm beautifully.
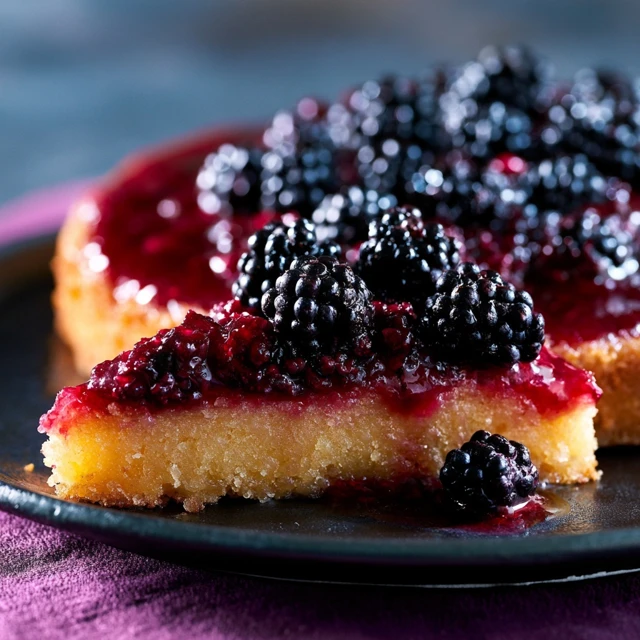
Weeknight Blackberry Cake: A Camp Stove Dessert That Actually Works
Ingredients
Method
- Grease a 10-inch cast iron skillet or heavy-bottomed skillet with butter or oil. Set aside.
- In a medium bowl, whisk together the flour, sugar, baking powder, and salt.
- In a separate bowl, whisk the melted butter (or oil), milk, egg, and vanilla extract until smooth.
- Pour the wet ingredients into the dry ingredients. Stir until just combined—do not overmix. A few lumps are fine.
- Spread the blackberries evenly over the bottom of the prepared skillet. Pour the batter gently over the berries, spreading it to the edges.
- Place the skillet on a camp stove. Set up a heat diffuser: fold a sheet of heavy-duty aluminum foil into a 12x12-inch square, then crumple it slightly and place it under the skillet. This prevents direct heat from scorching the bottom.
- Light the stove and set to low heat. Cover the skillet with a tight-fitting lid or a large sheet of foil crimped around the edges.
- Cook for 30 to 40 minutes, rotating the skillet a quarter turn every 10 minutes for even baking. Check doneness with a toothpick after 30 minutes.
- Once done, remove from heat. Let the cake rest in the skillet for 5 minutes. Serve warm, directly from the skillet. A dollop of yogurt or a dusting of powdered sugar is nice but optional.