
The first time I baked banana nut bread over a camp stove, I was a little skeptical. Would the heat be even? Would the bottom burn before the middle set? But the smell that drifted up when I lifted the lid—sweet banana, toasted nuts, a hint of caramel—told me I was onto something good. This isn’t a recipe you need to save for a full kitchen. With a few tools and a bit of patience, you can pull a moist, nut-studded loaf from a Dutch oven or a covered pot on a two-burner camp stove.

Why Backyard Banana Nut Bread Belongs in Your Camp Cooking Repertoire
Banana nut bread is forgiving. The natural moisture in ripe bananas helps prevent drying out, even when your heat source isn’t perfectly calibrated. And it travels well—slice it ahead of time and pack it for a day hike, or serve it warm with a smear of butter after a long afternoon of setting up camp. The key is understanding how to adapt a standard oven recipe to the quirks of campfire or camp stove heat.
The Gear: What You Actually Need
You don’t need a fancy camp oven. For the campfire method, a 10- or 12-inch cast-iron Dutch oven with a flat lid works best. For a camp stove, you’ll need a pot large enough to hold your loaf pan (a 9×5-inch pan fits inside a 6-quart stockpot), plus a tight-fitting lid. A heat diffuser—a simple metal plate that sits between the burner and the pot—helps spread heat evenly and prevents scorching. If you don’t have one, a couple of layers of heavy-duty aluminum foil under the pot can work in a pinch.
The Technique: How to Get Even Heat Without an Oven
Here’s the trick that makes all the difference: never place the loaf pan directly on the bottom of the pot or Dutch oven. That direct contact is what causes burnt bottoms and raw centers. Instead, use a small metal trivet, a wire cooling rack bent to fit, or even a handful of clean, dry pebbles (about the size of your thumb) to create an air gap. I’ve used all three methods, and each works as long as the pan isn’t touching the hot metal directly.
For the camp stove method, preheat the pot with the lid on for five minutes over medium-low heat. Then set the pan on the trivet inside, cover, and let it bake. Rotate the pot a quarter turn every 15 minutes—this compensates for hot spots that most camp stoves have. If you notice the bottom browning too fast, lower the heat or slide the pot to the edge of the burner.
For the campfire method, the classic rule is to use twice as many coals on top as on the bottom. For a 10-inch Dutch oven, that means about 6 coals underneath and 12 on the lid. But here’s what I’ve learned: start with fewer coals on the bottom (4 or 5) and more on top (10 to 12). The bread bakes from the top down, and the bottom stays gentler. Check the loaf after 30 minutes by inserting a skewer through the center—if it comes out with wet batter, add a few more coals to the lid and give it another 10 minutes.
Common Mistake to Avoid
The biggest error is lifting the lid too often. Every time you peek, you let out steam and drop the temperature inside. Resist the urge to check more than twice during the bake. Instead, rely on smell—when the sweet banana and nutty aroma fills the air around your campfire or stove, the bread is likely close to done.
Adapting for Weather and Conditions
Wind is the enemy of even camp stove heat. Set up a windbreak—a cooler, a backpack, or even a large rock—on the windward side of your stove. If you’re baking in cold weather (below 50°F), expect the cook time to stretch by 10 to 15 minutes. The pot loses heat faster, so keep the lid on and resist turning up the burner, which will just scorch the bottom. In hot, humid conditions, the bread may need a few extra minutes because the batter absorbs moisture from the air—check with a skewer rather than relying on the clock.
Safety Note
Never use a camp stove or a charcoal fire inside a tent or an enclosed shelter. Carbon monoxide builds up fast and is invisible. Always cook in a well-ventilated outdoor space. When using a Dutch oven with coals, wear heat-resistant gloves and set the pot on a stable, non-flammable surface like a flat rock or a metal camp table.
Takeaway
Backyard banana nut bread is more than a treat—it’s proof that good camping food doesn’t require a full kitchen. With a trivet, a covered pot, and a little attention to heat management, you can bake a loaf that rivals anything from home. And when you slice into that tender, nut-flecked crumb at your campsite, you’ll know exactly why it was worth the effort.
Frequently Asked Questions
Can I make banana nut bread without an oven at a campsite?
Absolutely. Use a Dutch oven with coals on top and bottom, or a camp stove with a covered pot and a heat diffuser. Both methods create even, gentle heat for a moist loaf.
How do I keep banana nut bread from burning on the bottom?
Place a metal trivet or a layer of clean pebbles inside the Dutch oven before setting in the batter pan. This lifts the pan off the direct heat and prevents scorching.
What nuts work best in this recipe?
Walnuts or pecans are classic. Toast them lightly in a dry skillet over the camp stove first to deepen their flavor before folding into the batter.
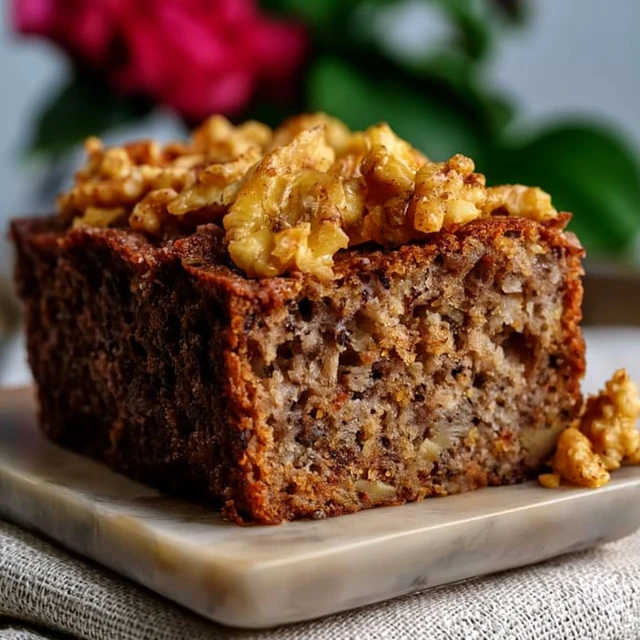
Backyard Banana Nut Bread: A Camping Treat You Can Make at Home
Ingredients
Method
- Light your camp stove or build a small fire and let it burn down to coals. You want a steady, moderate heat—about 350°F (175°C). If using a camp stove, set it to medium-low.
- Grease a 9x5-inch loaf pan or a small cast-iron skillet. If you're using a Dutch oven, place a metal trivet or a few clean pebbles in the bottom to lift the pan off direct heat.
- In a medium bowl, mash the bananas with a fork until mostly smooth. Stir in the melted butter or oil, sugar (or honey), beaten egg, and vanilla.
- Sprinkle the baking soda and salt over the mixture and stir well. Then fold in the flour just until no white streaks remain—overmixing makes the bread tough.
- Fold in the chopped nuts. Pour the batter into the prepared pan and smooth the top.
- For camp stove baking: Place the pan inside a large pot with a tight-fitting lid. Set the pot on the stove over medium-low heat. Put a heat diffuser under the pot if you have one. Cover and cook for 40–50 minutes, rotating the pot a quarter turn every 15 minutes to avoid hot spots. Check doneness by inserting a skewer—it should come out clean.
- For campfire baking: Place the lid on the Dutch oven and set it on a bed of coals. Arrange about 8–10 hot coals on top of the lid. Bake for 40–50 minutes, checking halfway. Add or remove top coals to maintain steady heat.
- Let the bread cool in the pan for 10 minutes, then turn out onto a rack or a clean cloth. Slice and enjoy warm or at room temperature.