
I love the moment when the lid comes off a Dutch oven and the smell of warm peaches and butter hits the cool evening air. That sweet, fruity steam mingling with woodsmoke is the kind of camping memory that sticks with you. One-pan peach cake is my go-to when I want a real dessert without hauling a kitchen’s worth of gear. It’s forgiving, uses pantry staples, and cleans up in a single pot.

Why This Method Works
The trick is layering, not mixing. Canned peaches in heavy syrup go in first, creating a moist, jammy base. Dry cake mix gets sprinkled on top—no bowl, no whisk. Butter pats melt through the powder, forming a buttery crust as it bakes. The steam from the peaches rises and cooks the cake from below, while the lid traps heat and creates a golden top. No stirring means you get distinct layers: fruit on the bottom, tender cake on top, and a slightly chewy edge where they meet.
Choosing Your Gear
A 10-inch cast iron Dutch oven is ideal. It holds the heat evenly and the heavy lid creates the oven-like environment you need. If you don’t have one, a 10-inch cast iron skillet with a tight-fitting lid works, or even a deep stainless steel pot. The key is a lid that seals well. Thin pots will scorch the bottom, so if that’s all you have, use a heat diffuser or place fewer coals directly underneath. For a camp stove, keep the flame on medium-low and check the bottom after 15 minutes.
Fuel and Fire Management
For campfire cooking, the coal count matters more than the flame. You want a steady, moderate heat—about 350°F (175°C). For a 10-inch Dutch oven, that means roughly 8-10 briquettes underneath and 14-16 on top. Wind steals heat fast, so if it’s breezy, add two or three extra coals on the windward side. On a still, warm evening, you might need one or two fewer. Rotate the oven and the lid a quarter turn every 10 minutes. This prevents hot spots and gives you that even, bakery-style color.
The Common Mistake to Avoid
Don’t stir the cake mix into the peaches. I know it’s tempting to swirl it all together like a cobbler, but that makes a gummy, uneven mess. The dry powder needs to sit on top so the butter can melt into it and the steam can rise through it. If you stir, you’ll end up with a dense, sticky paste instead of a light cake. Trust the layers.
Adapting for Weather and Conditions
On a cold or rainy day, the cooking time will stretch. The coals have to work harder to maintain temperature, so add 5-10 minutes and check with a skewer. In high heat or direct sun, the oven might cook faster on the bottom—use fewer coals underneath and more on top. If you’re camping with kids, let them help sprinkle the cake mix and dot the butter. It’s a safe, hands-on step that builds excitement. Just keep little fingers away from the hot lid and coals.
Serving and Storing Leftovers
Let the cake rest for five minutes after cooking. This lets the fruit layer thicken slightly and the cake set. Scoop straight from the pot into bowls or onto plates. Leftovers keep well in a sealed container for a day, but honestly, it rarely lasts that long. Reheat gently in the Dutch oven with a few coals on top, or in a skillet over low heat. If you’re in bear country, store any leftovers in a bear canister or hung properly—sweet food smells attract wildlife.
The Takeaway
One-pan peach cake is the kind of camping dessert that feels special without being fussy. It uses ingredients you can pack easily, requires only one pot, and delivers a warm, comforting finish to a day outdoors. Master the coal count and the no-stir rule, and you’ll have a reliable recipe that works in almost any campsite kitchen.
Frequently Asked Questions
Can I use fresh peaches instead of canned?
Yes, but you’ll need to peel and slice 3-4 ripe peaches, and add 1/4 cup of sugar and 1 tablespoon of lemon juice to the pan to create enough syrup. The cooking time may increase by 5-10 minutes since fresh peaches release less liquid.
What size Dutch oven do I need?
A 10-inch or 12-inch Dutch oven works best. A 10-inch oven will give you a thicker cake, while a 12-inch makes a thinner, faster-cooking version. Both fit a standard 15.25-ounce box of cake mix.
How do I know when the cake is done without an oven thermometer?
Insert a clean stick or skewer into the center—if it comes out clean or with just a few moist crumbs, it’s done. The edges should pull away slightly from the pan, and the top will be golden brown.
Can I make this cake without a Dutch oven?
Absolutely. Use a 10-inch cast iron skillet with a tight-fitting lid or a stainless steel pot with a lid. The key is even heat distribution. If using a thin pot, place a heat diffuser or extra coals under it to prevent burning.
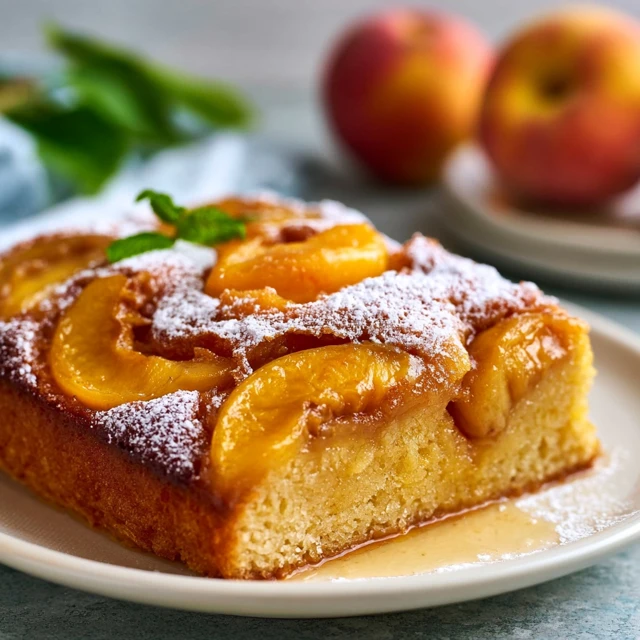
One-Pan Peach Cake for Camping: A No-Fuss Dutch Oven Dessert
Ingredients
Method
- Prepare your campfire or camp stove: For a campfire, light a fire and let it burn down to a bed of hot coals. You'll need about 8-10 coals under the Dutch oven and 14-16 on top for a 10-inch oven (adjust for wind and temperature). For a camp stove, set it to medium-low heat.
- Place the Dutch oven or heavy pot on a heat-safe surface. Open the can of peaches and pour the entire contents (peaches and syrup) into the pot. Spread the peaches evenly across the bottom.
- Sprinkle the dry cake mix evenly over the peaches. Do not stir. Use a spoon to gently level the powder without mixing it into the fruit.
- Dot the top of the cake mix with the cubed butter, spacing them evenly. If using cinnamon and nutmeg, sprinkle them over the butter.
- Cover the Dutch oven with its lid. For campfire cooking, use a lid lifter to place the oven onto the coals, then arrange the remaining coals on top. For a camp stove, simply cover and let it cook.
- Cook for 30-40 minutes, rotating the lid and the oven a quarter turn every 10 minutes to prevent hot spots. The cake is done when the top is golden brown and a skewer inserted in the center comes out clean.
- Carefully remove the Dutch oven from the heat using heavy gloves or a lid lifter. Let it rest, uncovered, for 5 minutes. The cake will continue to set as it cools slightly.
- Scoop servings directly from the pot onto plates or bowls. Serve warm as is, or with a dollop of whipped cream or a scoop of vanilla ice cream if you have a cooler.