
There’s something about the smell of pancakes cooking over a camp stove that makes a morning feel right. But the mixing bowl, the whisk, the sticky spatula — that’s the part I could do without. Especially when you’re trying to keep your campsite clean and your gear minimal.

This quick banana pancake method solves that. No bowl. No whisk. No extra dishes. Just a resealable bag, a ripe banana, and a few pantry staples. The bag becomes your mixing bowl, your piping bag, and your trash liner all in one. It’s the kind of trick that makes you wonder why you ever did it the other way.
The Bag Method: Why It Works for Camping
Mixing pancake batter in a bag isn’t new, but it’s a technique that shines when you’re tent camping. Here’s why: you don’t need a flat surface to whisk. You don’t need running water to rinse a bowl. And you don’t end up with batter under your fingernails while you’re trying to keep your camp stove lit in a breeze.
The key is using a sturdy quart- or gallon-size freezer bag — the thicker plastic holds up better when you’re squishing and kneading. A standard sandwich bag will likely split at the seam. Trust me on that one.
One Bag, Three Jobs
First, it’s your mashing tool. Put the banana in, seal it, and use your hands to break it down. You can feel the lumps through the plastic and work them out without getting sticky. Second, it’s your mixing bowl. Add the dry ingredients, the egg, and a splash of milk or water, then knead and squish until combined. Third, it’s your piping bag. Snip a corner, and you can dispense batter directly onto the pan — no ladle, no drips.
Wind and Rain: Adapting the Method
Camping in a breeze? Set up your stove in the lee of your vehicle, a large rock, or a windbreak. A gust can blow the batter stream off course or cool your pan unevenly. If it’s windy, hold the bag lower, close to the pan surface, and squeeze gently.
For rainy mornings, I cook under the vestibule of my tent — with the fly extended and the stove on a stable, level surface well away from tent walls. Never cook inside a closed tent; carbon monoxide from a camp stove is invisible and deadly. Always keep ventilation open.
The Banana Factor
The riper the banana, the better the pancake. A spotty, soft banana mashes easily and adds natural sweetness, so you can skip added sugar entirely. If your banana is still firm, it won’t break down as well, and you’ll end up with lumpy batter. That’s fine for texture, but the pancakes won’t be as sweet.
A single medium banana is enough for a batch that feeds two people. If you’re cooking for a family, double the recipe and use a gallon-size bag. Just be careful not to overfill — you need room to squish.
Common Mistakes to Avoid
The biggest error is making the batter too thick. It should flow slowly from the snipped corner — think thick cream, not paste. If it won’t come out, add another tablespoon of milk or water and knead again. Too thin, and the pancakes will spread into thin, lacy disks that burn before they cook through.
Another mistake: forgetting to oil the pan between batches. The bananas add natural sugar that can stick and burn. A quick wipe with a paper towel and a fresh dab of butter or oil keeps things non-stick.
Stovetop Technique for Even Cooking
Set your camp stove to medium heat — not high. A pan that’s too hot will brown the outside while the inside stays raw. If the butter sizzles and browns immediately, turn the flame down. Let the pan heat for a minute before adding the first batch.
Cook until you see bubbles forming on the surface and the edges look dry, about two minutes. Flip gently — the banana makes these pancakes a bit more delicate than standard ones — and cook another minute or two. They should be golden brown and spring back when you press the center.
Make It Your Own
Once you’ve got the basic method down, you can vary it. Add a pinch of cinnamon or a splash of vanilla to the bag before mixing. Throw in a handful of chopped nuts or chocolate chips after snipping the corner — just knead them in gently so they don’t tear the bag. For a gluten-free version, substitute an equal amount of your favorite gluten-free flour blend; add an extra tablespoon of milk if the batter seems stiff.
These pancakes are best eaten right away, while they’re still warm and tender. If you’re making a big batch, keep them in a covered pan or wrap them in a clean dish towel. A drizzle of maple syrup or honey and you’ve got a camp breakfast that feels like a treat — with almost no cleanup.
Takeaway
Quick banana pancakes from a bag are about working smarter, not harder. Less gear, less mess, more time to enjoy the morning. Try it once, and you’ll probably never go back to a bowl.
Frequently Asked Questions
Can I use overripe bananas for these pancakes?
Yes, overripe bananas are actually best. They mash easily and add more natural sweetness, so you can reduce or skip added sugar. Just mash them well in the bag before adding other ingredients.
How do I keep pancakes warm while cooking the rest?
Place cooked pancakes on a plate covered with a clean towel or a lid from a pot. Set it near the camp stove but not directly over the flame. In cool weather, you can also wrap the plate in a small blanket.
What if I don’t have a griddle? Can I use a regular pan?
A regular non-stick frying pan works fine. Just be aware that the pancakes may be slightly smaller and you might need to cook them in batches. Add a little butter or oil to prevent sticking.
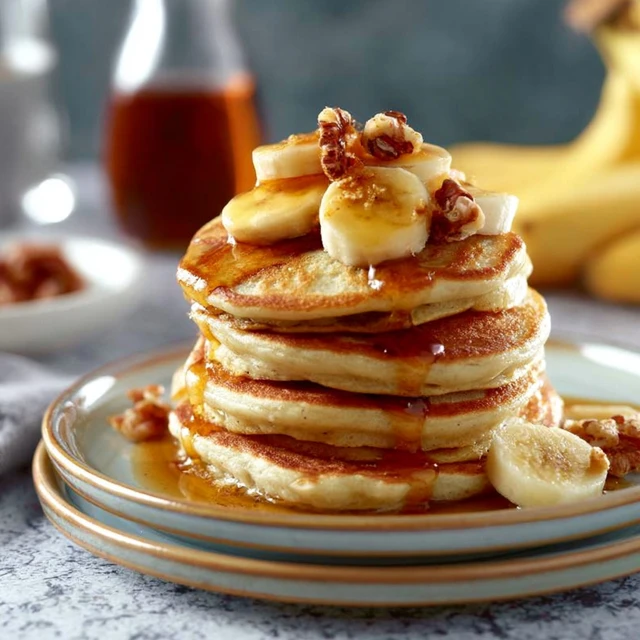
Quick Banana Pancakes for Camping: No-Mess Method
Ingredients
Method
- Place the banana in a quart-size resealable plastic bag. Seal the bag and mash the banana with your hands until smooth, working out the big lumps.
- Open the bag and add the flour, baking powder, egg, and milk or water. Reseal the bag, squeezing out the air, then knead and squish the bag until all ingredients are combined into a smooth batter. If it's too thick, add another tablespoon of milk or water.
- Snip a small corner off the bottom of the bag (about 1/2 inch). This creates a piping bag for easy, clean dispensing.
- Heat a camp stove to medium heat and place a non-stick pan or griddle on it. Add the butter or oil and let it melt, tilting the pan to coat the surface.
- Pipe the batter directly from the bag onto the hot pan, forming 3- to 4-inch circles. Cook until bubbles form on the surface and the edges look set, about 2 minutes. Flip and cook another 1-2 minutes until golden brown.
- Repeat with remaining batter, adding more butter or oil as needed. Serve warm with maple syrup or honey.